It is a slow route to home-baking sourdough
From what I have read and watched, let’s start with what has been most useful. Let’s start with the main differences between home-baked fast acting or commercial yeast bread and home-baked sourdough – because I did not know there even was even a difference when I started – and you may not either. The main differences lie in the taste, the type of leavening agent used and the fermentation process (I did warn you about the sourdough language). Lastly, and this is very difficult to articulate, I would suggest there’s is something in the fact that home-baked sourdough offers a curious mix of hopeful expectation, patience, accountability, learning-on-the-job, and the tussle of success and disappointment. Of mindfulness and well-being associated with creating something with our own hands.*
I would come back to this reflection and explore this in a later post, with hindsight, some months later.*
Take a bite out of a handsome slice of sourdough and another from a loaf made from commercial yeast and you’ll notice a difference right away. Sourdough breads just taste better, the flavours are more complex, caramel and earthy, more aromatic and dairy. The improved flavour comes from a sourdough starter’s microbial diversity, a feature that commercial yeast lacks. Commercial yeast breads have that all too familiar sweetness and beer-like aroma that often dominates. Sourdough breads are also more digestible for most people, with a greater bioavailability of nutrients, and are well-tolerated by those with certain sensitivities to commercial baker’s yeasts, sugars, or other additives. Commercial yeast breads have their place, sourdoughs are a different beast.
Next, when and where these matter? Why is home-baked sourdough so popular? Flavour and texture.
- Leavening Agent:
- Home-Baked Yeast Bread: Commercial yeast. Commercial yeast provides a quick rise to the dough, resulting in a soft and uniform texture. Fermentation is relatively short compared to sourdough. There are two types of commercial yeast: Fresh and dry yeast. Fresh yeast has a moist, crumbly consistency and does not require activation. Dried yeast, both active dry and instant, looks and feels like sand, has a much longer shelf-life and requires activation with warm water.
- Home-Baked Sourdough: Sourdough bread is leavened using a naturally occurring mixture of friendly lactic acid bacteria and wild yeast present in a sourdough starter. This starter is created by fermenting flour and water over time. Sourdough fermentation is slower than commercial yeast fermentation.
- Fermentation Process:
- Home-Baked Yeast Bread: With commercial yeast, the fermentation process is relatively quick and can be completed within a few hours, however this limits flavour development.
- Home-Baked Sourdough: Sourdough bread requires a longer fermentation process. The sourdough starter needs to ferment and develop over several hours to days (either – ambient temperatures, or slow / retarded refrigerated temperatures). The bulk fermentation and proofing stages are extended, allowing for complex flavours to develop.
- Flavour and Texture:
- Home-Baked Yeast Bread: Bread made with commercial yeast tends to have a more neutral flavour and a consistent, soft texture.
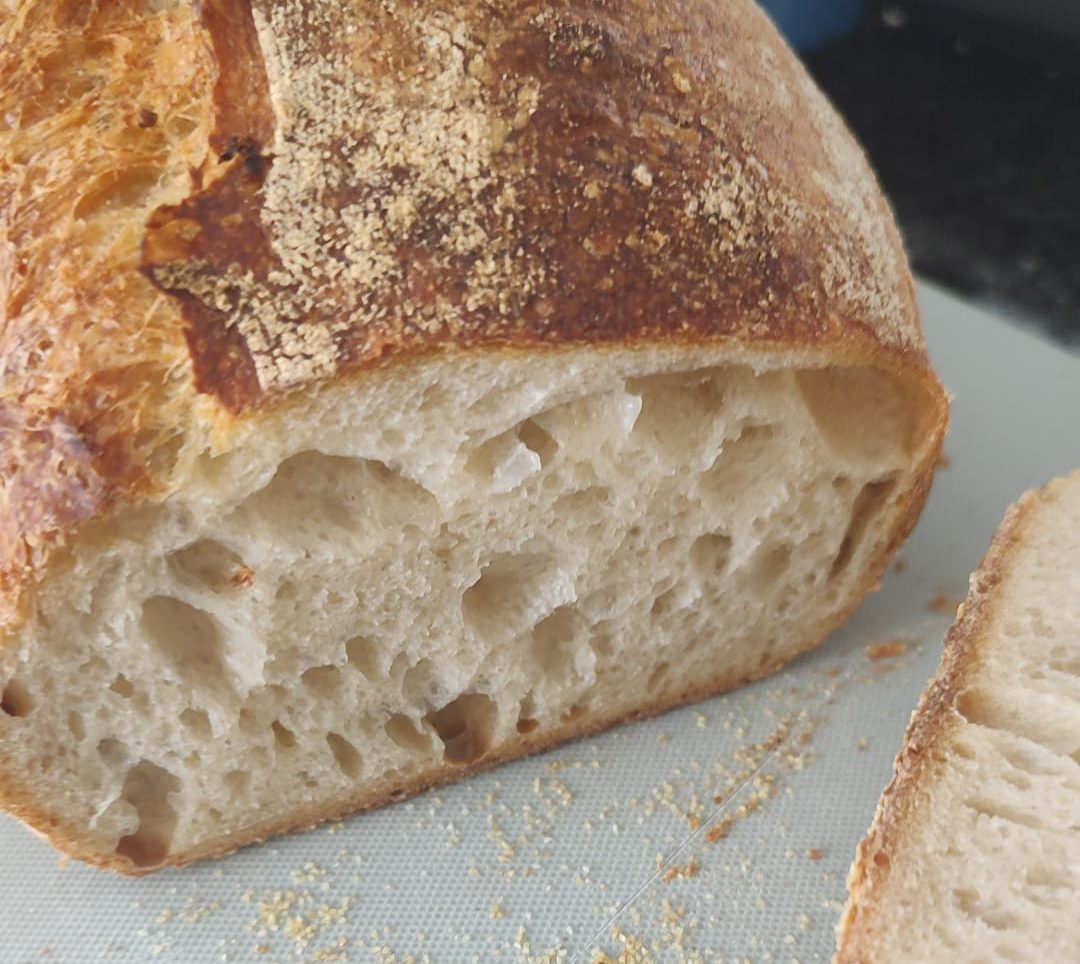
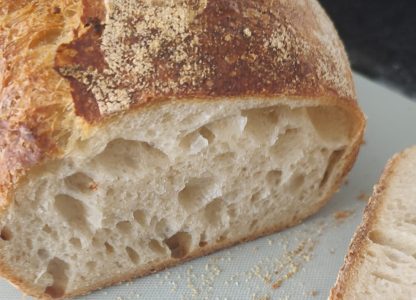
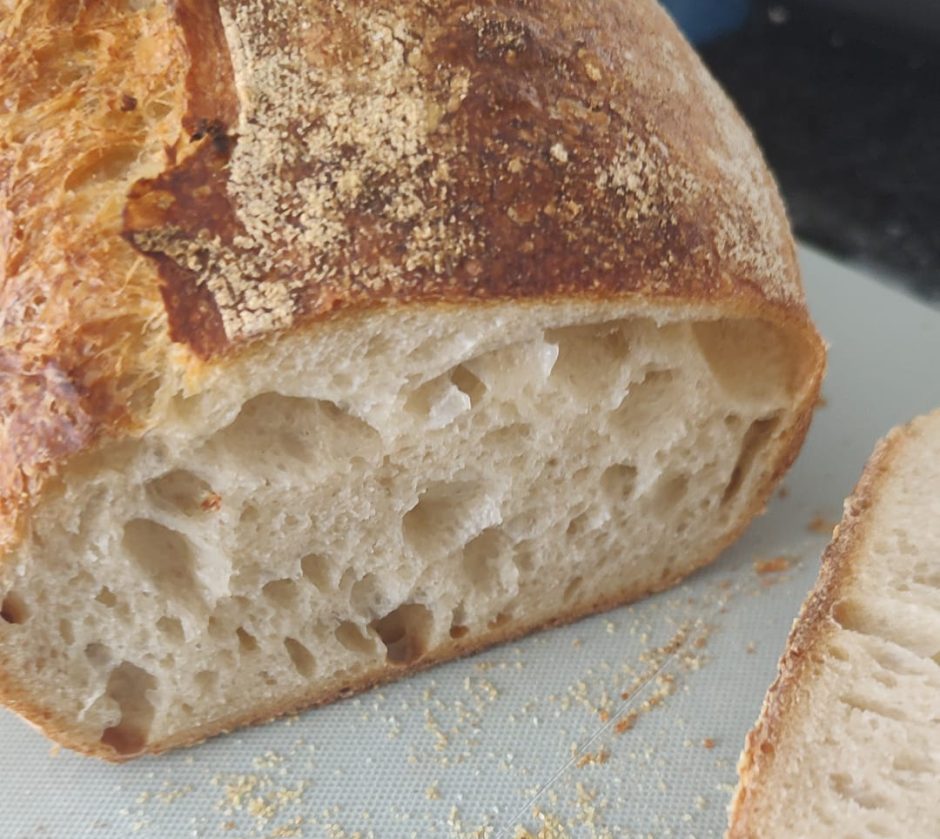
- Home-Baked Sourdough: Sourdough bread has a distinct tangy flavour profile that comes from the lactic acid produced during the longer fermentation process. It often has a characteristic tanginess, crisp crust, aerated chewy crumb, and irregular holes in the interior.
- Preparation and Timing:
- Home-Baked Yeast Bread: Bread made with commercial yeast requires less time for preparation and rising, making it a good choice for when you want freshly baked bread relatively quickly.
- Home-Baked Sourdough: Sourdough bread requires more planning and patience due to the longer fermentation times and extended rest periods between actions. The sourdough starter needs to be maintained somewhat regularly.
- Starter Maintenance:
- Home-Baked Yeast Bread: Simply add the commercial yeast to your dough when mixing.
- Home-Baked Sourdough: Sourdough bakers need to care for and maintain their sourdough starter by feeding it regularly to keep it active and healthy. But honestly, it is all part of the endearingness of the sourdough experience.
Both types of bread baking have their own merits, and the choice between home-baked yeast bread and home-baked sourdough depends on your preferences, time availability, and desired flavour and texture. We have fun with home-baking both!
What is worth knowing before baking your first sourdough?*
The future of modern bread is in the past.
Karl de Smedt
Is there a shorter, more direct route to home-baking your first sourdough loaf?
Disclaimer – I may be a well-read, well-watched novice, I continue to home-bake and practice. Baking one or two sourdoughs a week, means I am on a steady and slow learning schedule.
An enthusiastic novice, I watch and understand the honed craft of professional bakers, hundreds of loaves invested. I understand the principles of the sourdough, the chemistry. I appreciate the “deceptive simplicity” of home-baking sourdough. Now for the craft.
- Complex-simplicity: There are a number of very simple variables in play and in flux when making home-baked sourdough: temperature, ingredients, ingredient ratios and time- and the craft of baking. A beautifully, simply-complex endeavour.
- Keep constant what you can. The flour type, water temperature, when and where you bulk ferment.
- Bakers Maths – using baker’s percentage, each ingredient in a formula is expressed as a percentage of the flour weight, and the flour weight is always expressed as 100%.
- Important: The higher the hydration the more challenging the dough is to handle.
- Sourdough is not a one size fits all – there are many variables that can effect sourdough along with the hydration calculation, temperature and flour type (see hydration for more discussion)
- Important: The higher the hydration the more challenging the dough is to handle.
- Patience: Baking sourdough bread will teach you patience. You have to work with the dough. Take your lead from the dough. From growing your own starter or SCOBY, to mixing, resting, shaping and stitiching, and baking and importantly – waiting for the bread to cool. Sourdough will test your patience. Success one loaf, is no guarantee of success the next, until you develop your expertise.
- Large digital scales are required. Everything is weighed not measured. Can you see the display with a large mixing bowl sat upon the scale?
- I have not yet used a digital thermometer.
- Sourdough starter / mother / SCOBY: Sourdough bread is made using naturally occurring friendly lactic acid bacteria and wild yeast from a sourdough starter, mother or SCOBY (Symbiotic Colony of Bacteria and Yeast).
- The wild yeast that gives your sourdough starter – “life,” is more likely to be found in organic and wholegrain flour, than basic, bleached or more processed (cheaper) bread flour. That is why you will see a 50:50 mix reported as increasing your chances of a successful starter and home-bake.
- The starter mixture of flour and water ferments over time. It’s important to understand the fermentation process and how it effects the final sourdough bread.
- Sourdough starters like room temperature – 22-24°C/70-75°F. I am trialing temperature strips like those you see on the side of fish tanks.
- Changing the starter flour, changes the flavour of your sourdough bread (wholewheat / rye tends can add “tang,” white flour add a “sweetness.”
- A pleasant, white wine, slightly sour smell indicates a good balance of yeast and lactic acid bacteria. (More vinegary, your starter is hungry and needs feeding.)
- A young starter, only a few hours after feeding, will smell sweeter. A more mature starter will smell a bit more vinegary and funky – and offer a more sour taste.
- Dome shaped and bumpy surface – bubbles at the surface.
- Spongey, thick, viscous – larger bubbles, a honeycomb network or mousse.
- Stretchy and elastic
- A wet starter will be encouraged to produce more lactic acid, which gives your sourdough a more mild yoghurt flavour.
- A dryer starter will produce more acetic acid, giving your sourdough a more sour flavour.
- The longer you push the fermentation, the more acidity.
- If you like the sour flavour, you have to push your fermentation longer. This also means you will probably need a Dutch oven or have a very strong gluten flour that is able to withstand long fermentation times.
- As a general rule, a spoonful of active starter should float in water. If the starter is active, is full with gas, it will float on top of the water. Some say the test is inaccurate, others swear by it – a help marker.
- This test does not work with every flour, eg rye flour for instance.
- Ambient, on the counter, your starter needs to be fed daily.
- In the fridge, your starter may only need to be fed once a week.
- The wild yeast that gives your sourdough starter – “life,” is more likely to be found in organic and wholegrain flour, than basic, bleached or more processed (cheaper) bread flour. That is why you will see a 50:50 mix reported as increasing your chances of a successful starter and home-bake.
- Create a mature, strong and active starter: Your sourdough starter is the heart of your bread. It is one of the very few commonly agreed points in home-baked sourdough.
- Cultivating and maintaining a starter is not as difficult a task as I thought. There are uddles of “starter” “SCOBY” guides how-to’s in various media formats. Why does a well-maintained or well-fed, mature yet a ‘young,’ ‘active,’ or ‘at its peak,’ starter contribute to better flavour and rise in your bread? There is not a short answer to that question.
- Mature: With each feeding your starter becomes more mature and better at fermenting flour, with the microbes adapting more and more to the environment.
- First and important four tips.
- Remember your starter “grows,” doubling in size, so your jar needs to be big enough to accommodate “more than doubling in size” of your flour and water mix
- Let the starter breather – lose lids!
- If you can find them, straight-sided, (starter does not get stuck behind the ridges / lips) wide-mouth jars (spill less flour, easier to mix) are most practical.
- Pay more attention to your starter:
- What it looks like – bumpy at the surface. Not flat.
- The aroma – white wine, yogurty notes. Overly ripe and vinegary – the acid will overpower the other desirable flavours.
- How you ‘grow’ and how you maintain your starter influences that sourdough flavour.
- There are a number of recommendations for using organic flour for your starter specifically. This makes some sense, given you are ‘growing’ your starter, your yeast and bacteria.
- Ambient storage and retarded storage:
- Stored at room temperature: Warmer means fasters. Noticing the sweetspot a little tricker.
- Stored in the fridge, feed once a week and before baking
- Advice pushes towards using a ‘young,’ ‘active,’ ‘at its peak,’ starter (feed the night before mixing)
- Ambient storage and retarded storage:
- Temperature matters. In the summer use 10-15% flour and in winter 20%
- There are a number of recommendations for using organic flour for your starter specifically. This makes some sense, given you are ‘growing’ your starter, your yeast and bacteria.
- First and important four tips.
- Flour types – There is so much shared on flour quality and flour types. With so few ingredients – use quality ingredients. At a large scale, let the flour rest (20 days). Those in the know recommend developing your dough and bread knowledge before experimenting. Simply, with so many variables in play – it is no bad thing to keep it simple and keep it the same for a while. Yes, experimenting with different flour combinations can lead to unique flavours and textures in your bread, however be patient and take your time.
- Whole-wheat and rye flours ferment more actively than white sifted-wheat flours
- Aim for 12% protein or higher (12g of protein per 100g) for good gluten development. The protein content in the flour will dictate how much gluten is made, and how strong the dough is.
- Autolyse or rest periods for better texture: Autolyse is a rest period after mixing flour and water, allowing the flour to hydrate fully before adding salt and starter. There is a lot of opinion on this topic out there to review. The aim of the autolyse is to initiate enzymatic activity in the dough. and increase the doughs extensibility (the ability for the dough to stretch out without tearing). Increased extensibility helping the dough expand and fill with gasses, resulting in a light and airy loaf.
- Salt – As above – use quality sea salt. Most of the advice speaks to adding the salt after the initial mixing and rest period or autolyse. I tend to add the salt with the last 10-20g of water.
- Most bakers recommend 1.8 to 2% range.
- Too much salt can reduce the volume of your bread – sometimes significantly.
- Too little salt can result in a quicker proofing, which can effect the bread’s flavour.
- Hydration matters: Hydration refers to the ratio of water to flour in your dough. It’s usually expressed as a percentage.
- Hydration matters: Hydration refers to the ratio of water to flour in your dough. It’s usually expressed as a percentage.
- The amount of water relative to the flour is called the hydration percentage. Dough made with 600 grams of water and 1,000 grams of flour is 60 percent hydration,
- The amount of water your flour required is not fixed. It depends on the flour you use.
- Hold back 20g of water for when you add the salt.
- Higher hydration doughs (70% and above) are often stickier, require a longer knead to build the gluten, harder to shape, more likely to stick to the banneton, yet can lead to more open crumb structures and better flavour (due to more bacterial fermentation).
- Lower hydration doughs are easier to handle but might result in denser bread.
- I started baking sourdough with 70% hydration. With hindsight I would have start home-baking sourdough around 60% hydration.
- Next, I would adopt a “Bassinage methos apporach.” Adding a little more water after some kneading, after gluten has been developed.
- Finally, move to higher hydration doughs.
- I started baking sourdough with 70% hydration. With hindsight I would have start home-baking sourdough around 60% hydration.
- Develop gluten – stretching and folding: Proper gluten development is essential for good structure and rise in your bread. After autolysis, you can achieve gluten strength through “stretch and fold,” techniques and there is plenty of discussion around “slap and fold.”
- Using a large metal mixing bowl, where you can get you hands in to mix helps, plastic bowls allow you to see into the dough and the aeration that is developing
- Stretching the glutens allow for air to be trapped with the dough.
- Applying stretch and fold also redistributes heat, gas, and acidity – encouraging a more even crumb
- Watered hands reducing the dough’s tendency to stick to your hands.
- As you get to “know the dough” – you get to know when and how much stretching and folding is required – “Your hands will become your eyes,” Richard Bertinet.
- The most important part of developing the gluten, the kneading, is waiting
- Always cover your dough – keep it humid
- The window pane test allows you to see if you developed your gluten well enough. There are plenty of explanations for you to read.
- Be careful not to overwork the dough as this may cause the gluten threads to fall apart.
- Bulk fermentation (and folding): Bulk fermentation is the period when your dough rises after the starter is mixed in and the salt added. Generally speaking, time is taste.
- Folding the dough helps strengthen the dough and improve it’s structure. There is lots of advice out there for you to follow on how much and and many fold. Four folds, three times during the first 2 hours.
- Some recipes call for a single stretch and fold, others for multiple
- The folds redistribute areas that are fermenting faster than others
- Folding the dough helps strengthen the dough and improve it’s structure. There is lots of advice out there for you to follow on how much and and many fold. Four folds, three times during the first 2 hours.
- Shape (and stitching) properly: Shaping the dough before the final proofing is important to create tension on the surface, which helps the bread hold its shape during baking. This step requires practice and patience. Wet or oiled hands can help.
- Use the dough scraper to pull all the dough out of the container onto an unfloured work surface. Lightly flour the surface of the dough.
- Flip the dough.
- Folds sequence. The outer surface of the dough will become the crust, so you may use more flour on your hands to avoid sticking.
- By the end of the shaping, the dough should have a taut, smooth outer surface.
- After this initial shaping – rest on the work surface for 20 to 30 minutes. This stage is called the bench rest. Make sure the dough is not exposed
- Proofing – More Goldilocks : Proofing is the final rise of dough before baking. Controlling or scheduling the fermentation process is difficult – temperature is a key variable. Too short and you end up with crumb “craters,” or a heavy dough that lacks flavour. Too long and you end up with a flat sourdough with an overly acidic taste.
- Retarded – refrigerating your shaped dough overnight (or longer) to slow fermentation has two main aims. To help manage your day to day home-baking schedule (many breads can be retarded for 12 to 18 hours without adverse effect) and to develop flavour and a crispier crust.
- Retarding fermentation is said to develop more complex and mildly acidic flavours and make it easier to handle.
- Retardation can be used to help manage your day to day home-baking schedule.
- Use a consistent spot in your fridge as temperatures within the fridge can vary.
- Whilst retarding, to cover or not? Before baking, return to room temperature or not?
- Ambient – at room temperature.
- Handling: As bulk fermentation progresses, so you need to be progressively more considerate and gentle with your dough to maintain volume.
- Is it ready to bake? Look for volume. Now look for texture and small bubbles on the surface of your dough.
- Poke test: Flour your thumb and gently press up to 1cm deep into the dough. If the dent is still visible one minute later, your dough can be baked. Re-test every 15-20 mins.
- Below 4C the fermentation comes to a halt. The dough can rest in the fridge for up to 24-48 hours.
- Aliquot jar. Take a small sample, pop it in a very small jar and monitor. It mirrors or reflects the prove of your sourdough. Once doubled in size you are ready to bake.
- I have not use pH values.
- Preheat your oven: Preheat your oven (and the dutch oven). There is quite a bit of advice for that preheating to be prolonged – 20-60 mins.
- Oven temperature is a key factor – for crumb and crust.
- Make sure your Dutch oven is clean (no semolina bread marks from last bake).
- Your Dutch oven will preheat more slowly than your oven thermostat reading. When your oven reaches the desired preheating temperature setting, your Dutch oven will be cooler.
- Small Dutch ovens bake hotter than large Dutch ovens.
- I’ve have used both ceramic and cast-iron Dutch ovens successfully. No stone. No water.
- Oven temperature is a key factor – for crumb and crust.
- Scoring: Make shallow cuts (scores) at a low angle (I only learnt that after banking seven semi-successful loaves) on the surface of the dough before baking with a lame, a very sharp knife or scissors. This allows the bread to expand properly (the fancy word they use is ‘oven spring’ to create the ‘ear’) and it gives the loaf that artisan attractive appearance.
- The curved line is actually created by a straight line cut.
- I have tried a lame/blade/grignette, but prefer scissors – (I need to develop my scoring technique with the lame)
- On my third sourdough loaf, I accidentally scored the bottom of the loaf! Scoring the dough whilst still in the banneton before turning it out!
- Bake: Every oven is different. Preheating is an often debated sourdough topic. Preheat 230C. Once the bread is in the Dutch oven, in the oven, reduce the temperature to 200-180C.
- Baking with steam is essential for achieving optimal ovenspring. In a Dutch oven, the hydration of your loaf creates its own steam chamber.
- After 20-25 minutes, remove the lid and bake until you have the desired mahogany brown crust. (A tray under the Dutch Oven can reduce the crust burning on the bottom.)
- Every oven is different.
- Go off the colour – not time. The Maillard reaction responsible for the golden-brown mahogany crust arises from the high temperatures.
- Optional – turn off the oven. Put your loaf back in the Dutch oven and back in the oven with the lid ajar. This continues to dry out your sourdough and delivers a seriously intense crust.
- After baking: The ‘Knock Test’ on the bottom of the loaf, will help you decide if it is baked through.
- Do not cut into your loaf when it is just out of the oven or super warm. Leave the loaf to call for 30-50 mins. Patience.
- Patience and observation: Baking sourdough requires attention, observation and patience. I am learning to be more mindful, to keep an eye on the dough throughout the process, from mixing, folding, shaping, to baking, Make adjustments based on its behaviour, it’s appearance and responsiveness. Again – there is so much written about this. It is okay to take notes and these can sometimes help you back track to actions. eg Like not scoring the bottom of the loaf.
Home-baked sourdough is both art and science. It is also an experience, a teacher, medicine and medicinal. It may take more than a few tries to achieve the results you want but don’t be afraid to stick with a process and stick to the basics.
My first sourdough loaf. Not too bad, too light (I was impatient) great taste, modest spring due to a lack of shaping and the scoring was not at a low angle.
Next steps and improvements
- be more patient and offer a longer autolyse – dough extensibility (this has helped)
- hold back the salt until after the dough has autolysed – rested
- a little more effort with the initial kneading and folding (this has helped)
- practice the final shaping folds, for surface tension, and repeat the same steps (I am getting more skilled)
- score horizontally (this has helped)
- source a larger and metal mixing bowl to reduce mess – done
- order a higher quality flour – Shipton Mills #04 organic flour ordered
- Try with a little wholemeal bread flour to reduce hydration a little
When is the dough ready?
Just found this tip for the bulk fermentation: Take a little piece of dough and form it into a ball. Pop it in to a small shot glass and mark where the dough is on the side with a sharpie. Once the dough inside the glass doubles, your bulk fermentation should be finished and you can move onto shaping it and placing into your banneton basket or other shaping container. This technique is called an “aliquot jar”.
Pingback: Home-baked bread to home-school sourdough (part I) – Edventures
Pingback: Home-baked bread to home-school sourdough (part iv) before baking – Edventures
Pingback: Home-baked bread to home-school sourdough (part x) In search of ‘spring’ – Edventures
Pingback: Home-baked bread to home-school sourdough (part vi) schedules, shaping, stitching and tension – Edventures