Having mixed your dough, time to prove your dough, shape your dough, then bake your sourdough and grow your sourdough starter.
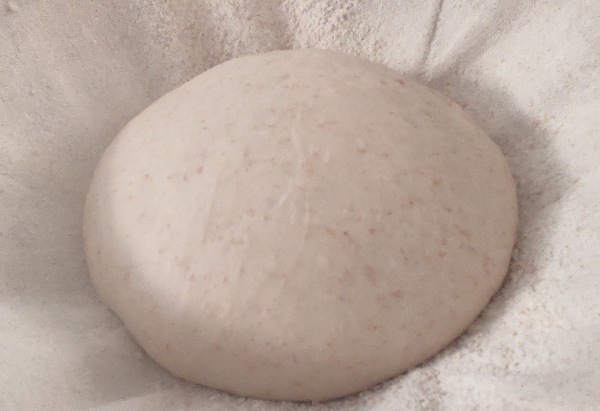
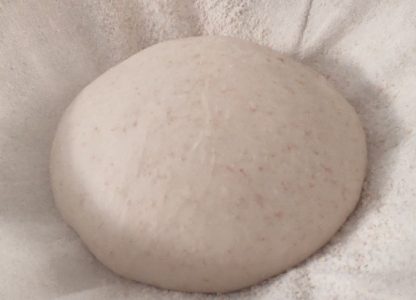
Once transferred to your bowl or banneton it is time to prove your dough.
Is my sourdough ready to bake? Look for volume. Now look for texture and small bubbles on the surface of your dough.
- Flour your thumb and gently press up to 1 cm deep into the dough. If the dent is still visible one minute later, your dough can be baked.
- Re-test every 15-20 mins.
- Below 4C the fermentation comes to a halt. The dough can rest in the fridge for up to 24-48 hours.
Preheat your oven (and the Dutch oven): There is quite a bit of advice for preheating the oven for a prolonged time – 20-60 min to 230-240°C. (The Dutch oven takes longer to heat, than the oven itself).
- Oven temperature is a key factor – for crumb and crust.
- Your Dutch oven will preheat more slowly than your oven thermostat reading.
- Small Dutch ovens bake hotter than large Dutch ovens.
Scoring: Make shallow cuts (scores) at a low angle on the surface of the dough with a lame ((a double-sided razor-blade baking tool) before baking, (I have used scissors before, even a very, very sharp knife is not ideal). The incision allows the bread to expand or rise properly (the fancy term used is ‘oven spring’ to create the rounded expanded section or ‘belly’ and the crust, ridge or ‘ear’). This gives your loaf that artisan appearance.
Bake: Every oven is different. Preheat 230-240°C. Once the sourdough is in the Dutch oven, in the oven, reduce the temperature to 200-180°C.
- Baking with steam is essential for achieving an optimal oven spring. In a Dutch oven, the hydration of your loaf creates its own steam chamber.
- After 25-30 minutes, remove the lid and bake until you have the desired mahogany brown crust.
- Go off the colour – not time. The Maillard reaction responsible for the golden-brown mahogany crust arises from the high temperatures.
- Let it cool. Patience. This gives the loaf time to finish the cooking process and allow excess moisture in the crumb to move towards to crust.
- Sourdough keeps for a week. We have not managed to keep one for more than two days. It freezes really well. Remember slicing, freezing and toasting your sourdough makes it even more bio-accessible.
Maintaining your starter
Here is the short version:
Mix equal parts flour and water in a jar and wait. Discard some, and stir in more flour and water, and keep waiting. Repeating this process over and over, until the starter starts producing a bubbling, sludgy mass that rises, peakes and falls with some predictability. In time, this mixture contains the proper collection of yeast and bacteria that can cause your dough to rise and that distinctive tangy, sourdough flavour, crust and crumb. Your starter now has fermentative power.
Let’s get to work. Grab your clean and sterilised, straight-sided medium to large jar, circled with two elastic bands, and the starter mix prepared at the workshop. In case your starter fails:
- A 50:50 mix of organic bread flour and organic wholemeal flour – to increase our chances of success.
- Rested tap water. Letting it rest for a short while allows the chlorine to evaporate and get to room temperature water.
You only need to maintain a very small quantity of sourdough starter.
Conditions and temperature vary so we can only offer a guide (and there are many available online).
- Starter mix: 50g flour – 50g water – cover with a damp towel.
- Store in a warm / room temperature, non-drafty space: 22-24°C. (I have been experimenting with £1 temperature strips like those you see on fish tanks.)
- Day 2 – Rest
- Day 3 – 50g flour – 50g water (bubbling; a fresh, fruity aroma, and some evidence of expansion)
- Day 4 – Discard half: 50g flour – 50g water (activity; a more tangy aroma)
- Day 5 – Discard half: 50g flour – 50g water (do not be disheartened by a slowing of activity; continue with the schedule and eventually, the desired yeast and bacteria will move in and stabilise the starter.
- Day 6 – Discard half: 50g flour – 50g water (more consistent, vigorous activity, a more tangy aroma)
- Day 7 – Discard more than half so that you have 110g of sourdough starter ready to feed and bake with
- Store with the lid on
- Collect and store any “discard” (discarded starter) for other recipes
Pay attention to the way your starter looks, smells and behaviours (and yes, you can taste it a little bit).
- Use the bands to mark the current level of the starter and the other the active peak.
Feeding or baking your starter
Remember, there’s a difference between starter that’s being fed simply to keep it alive; and starter that’s being readied for baking.
A number of sourdough enthusiasts promote regularly feeding your starter ahead of baking with (2, even 3 feed cycles). If you are baking regularly, this is less critical.
- Stored in ambient temperatures – feed regularly 6-8 hours before baking
- Moved to the fridge and retarded, feed regularly; once a week
- Take it out of the fridge and feed it the night before baking
Your starter is ready to bake with when:
- the starter surface is bumpy
- the starter is viscous, active and near its peak. Not fallen and not thin (re-feed)
- it reliably bubbles and is active, doubling in size within 6 to 8 hours of feeding
- smells sharply sour but “clean.” it may be pungent, however, it shouldn’t be distasteful
- dependent on which bacteria survive, white wine, yoghurty dairy notes.
If neglected for an extended period, the liquid on top tends to turn from clear to dark-coloured. Simply stir the liquid back into the starter and feed it. Visible signs of mould, or an orange or pink tint/streak, or smells putrid — throw it out and start over.
Now for the longer version
Here’s the long version: A sourdough starter is a culture of microorganisms. Where do those microbes come from? They’re everywhere: In the flour you use, in the air, on your hands, in the jar, and maybe even on the mixing tools you use to stir the starter. The majority of microbes come from the flour and, to a much lesser extent, the surrounding air.
When flour and water mix, enzymes (amylases) in flour convert long starch molecules into simple sugars, providing the perfect fuel for microbial reproduction.
Yeasts contribute mainly to the leavening power of dough and somewhat to the flavour and aroma. How does yeast do that? Most yeasts convert simple carbohydrates (sugars) to carbon dioxide and ethanol. This process is known as alcoholic fermentation. As the naturally occurring yeasts feast on available sugars they multiply, faster at warmer temperatures, and slower at cooler temperatures. This process leads to the production of carbon dioxide, creating gas bubbles in the dough, which, when trapped (in a well-developed gluten matrix), expand the dough. When baked at a high temperature, these bubbles expand further as more and more carbon dioxide is produced until the yeasts die off, resulting in that airy, spongy loaf we call bread.
Much smaller than yeasts, lactic acid bacteria (or LABs) are found in decomposing plants, dairy products and on the skins of fruits and vegetables. These LABs outnumber yeasts by as much as 100 to 1. Like the yeasts, these LABs digest simple carbohydrates, but instead of the alcohol created by yeast, LABs mostly produce sour lactic acid as a byproduct, giving your sourdough its characteristic sour flavour. Second, LABs eliminate unwanted baddies and bacteria. Third, they preserve the sourdough. Fourth they help break down gluten over time, resulting in a softer, lighter texture.
In summary, yeasts give off ethanol, and LABs can tolerate ethanol quite well. On the flip side, LABs secrete acids, and wild yeasts are also tolerant of increasingly acidic conditions. All the time, yeast produces additional amylase enzymes which convert additional starch to simple sugars to help feed the whole gang. These two microbes survive, thrive, and outcompete others in a stable starter culture. An amazing, evolutionary symbiosis.

